


Table of Contents
- DIY Garage Organization for Beginners: Where to Start
- Phase 1: Declutter and Sort Before You Buy Anything
- Phase 2: How to Organize Small Garage Space with Zones
- DIY Garage Wall Storage Ideas That Maximize Vertical Space
- Weight Capacity and Structural Safety: What Can Your Walls Handle?
- Smart Storage Solutions: Shelving, Bins, and Overhead Racks
- Your Garage Organization Checklist for a Clutter-Free Space
- Maintenance and Seasonal Rotation: Keeping It Organized
- Frequently Asked Questions
Last Updated: September 8, 2026
DIY Garage Organization for Beginners: Where to Start
A cluttered garage is the most common reason homeowners avoid weekend projects. DIY garage organization for beginners doesn't require expensive renovations or a contractor; it requires a clear plan and a commitment to finishing one zone at a time.
The goal of any garage organization project is to reclaim floor space and create a functional area that matches how you actually work. Before buying a single storage bin or hook, understand what you own and how often you use it.
Phase 1: Declutter and Sort Before You Buy Anything
The biggest mistake beginners make is shopping for storage before clearing the space. You cannot organize clutter; you can only move it around. Start by pulling everything out and sorting it into four piles: keep, donate, sell, and trash.
Be ruthless: if you haven't used an item in over a year and it holds no sentimental value, it should leave the garage. Broken tools, dried-out paint cans, and boxes of mystery cables are prime candidates for disposal. For items you keep, group them by category immediately: automotive, gardening, tools, sports, and seasonal decor.
Phase 2: How to Organize Small Garage Space with Zones
Once you have a clear inventory, assign a permanent home to every category. Zone planning is the single most effective strategy for how to organize small garage space, because it prevents the "everything ends up in the middle of the floor" problem.
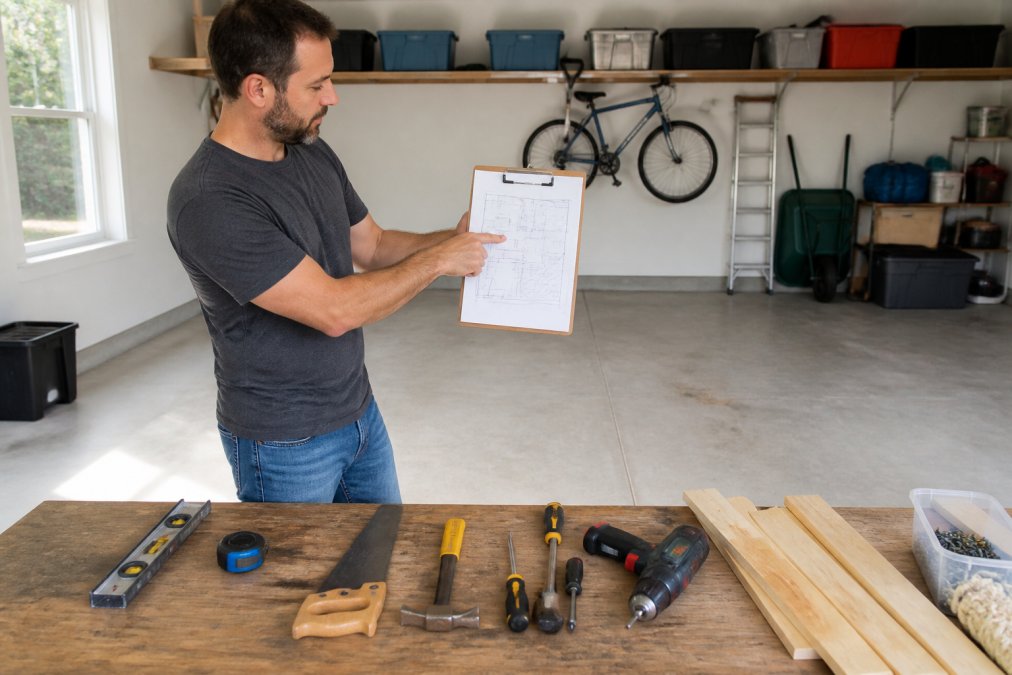
Start by sketching your garage layout on paper. Assign high-use zones closest to the entry door and seasonal or bulk storage toward the back. For example, the gardening zone should be near the side door if that is how you access the yard, while the automotive zone belongs where you park.
A practical framework for zoning is to divide your garage into four quadrants:
- Daily Use Zone: Items used weekly, like the recycling bin or the stroller, stored at arm's reach.
- Seasonal Zone: Holiday decorations and bulky winter gear, stored high on overhead racks.
- Project Zone: The workbench area with tools and materials for active DIY projects.
- Bulk Storage Zone: Costco-sized purchases and camping gear, stored on heavy-duty shelving.
DIY Garage Wall Storage Ideas That Maximize Vertical Space
With your zones mapped, the real transformation begins on the walls. DIY garage wall storage ideas are the most effective way to reclaim floor space, turning dead wall area into prime real estate for tools and equipment. The principle is simple: if it can hang on a wall, it should not sit on the floor.
Choosing Between Slatwall, Pegboard, and French Cleats
Three main systems dominate the market, each with a distinct trade-off between cost, flexibility, and load capacity.
Pegboard is the budget-friendly classic. A standard 4x8-foot sheet of 1/4-inch tempered hardboard is an affordable option (buildings.com). It is ideal for lightweight hand tools like screwdrivers, pliers, and wrenches. The key to a durable installation is to mount it with furring strips behind it, creating a 3/4-inch air gap that allows the metal hooks to seat fully and prevents bowing. A properly mounted 4x8 sheet can hold roughly 50-75 pounds of evenly distributed tools (familyhandyman.com).
Slatwall is the more versatile upgrade. Panels are typically made of MDF or PVC and cost between $40 and $80 per 4x8-foot sheet. The horizontal grooves accept a wide range of accessories, hooks, bins, shelves, and spools, that can be repositioned in seconds without tools. This makes slatwall the best choice for a workbench backsplash or a primary tool wall where you will frequently change the layout. The trade-off is that accessories are proprietary to the groove width, so you must stick with one brand (e.g., Rubbermaid FastTrack, Gladiator, or StoreWall) to ensure compatibility.
French cleats are the DIY purist's choice and offer the highest load capacity of any wall system. A French cleat is a simple two-piece wooden rail: one piece is angled at 45 degrees and screwed to the wall studs, the other is the matching angled piece attached to the back of your tool holder or cabinet. Because the load is transferred along the entire length of the cleat, a single 4-foot cleat made from 3/4-inch plywood can support several hundred pounds (popularmechanics.com). This system is ideal for heavy power tools, cordless drill stations, and custom-built tool caddies.
The Cordless Drill Station: A Step-by-Step First Project
A dedicated cordless drill station is the perfect first wall project because it solves a universal problem and teaches you the core mounting skills:
- Locate the studs. Use a magnetic stud finder to find the edges of two adjacent studs, typically 16 inches apart. Mark the center of each stud with a pencil.
- Mount a wall-mounted charging shelf. Purchase a purpose-built drill charger mount or a simple 12x6-inch wooden shelf. Position the shelf at shoulder height. Drill pilot holes and drive 2.5-inch wood screws into the studs. The charger itself will rest on the shelf and plug into a nearby outlet.
- Install tool hooks. On the wall next to the shelf, screw two heavy-duty 6-inch wall hooks into the studs. These will hold the drills themselves when they are not charging, keeping the charger bay free for the battery.
- Add a bit holder. Mount a magnetic bit holder (available for under $10) on the wall below the shelf. This keeps the 20 most-used driver bits visible and off the workbench.
This single project clears out a drawer, puts your most-used tool in a permanent spot, and takes less than an hour.
The "Tool Wall" Layout Strategy
Instead of scattering hooks randomly, plan a tool wall layout that groups items by frequency of use. The most effective pattern is a "work triangle" around your primary workbench:
- Zone 1 (Eye level, 60-70 inches from the floor): Daily-use tools, cordless drill, impact driver, tape measure, and utility knife.
- Zone 2 (Waist to shoulder height, 40-60 inches): Weekly-use tools, hammers, levels, and hand saws.
- Zone 3 (Below waist, 0-40 inches): Monthly-use tools, clamps, caulk guns, and rarely used power tool accessories.
For heavier items like extension cords, hoses, and folding chairs, install heavy-duty wall-mounted hooks directly into wall studs. A 12-inch hook rated for 50 pounds will hold a standard 50-foot extension cord coiled neatly. Never rely on drywall anchors alone for anything heavier than a broom.
Weight Capacity and Structural Safety: What Can Your Walls Handle?
This is the part most project galleries skip, and it is where garage organization goes wrong. Understanding weight capacity and structural safety is critical because a failed shelf can damage your car, your tools, or worse, injure you.
Standard residential garage walls are framed with 2x4 studs spaced 16 inches apart. A single stud, when properly anchored, can support a surprising amount of weight, but the load must be distributed correctly. For any shelving unit that will hold heavy items like tool boxes or bulk storage, you must anchor the unit into at least two wall studs. For overhead racks, the load-bearing connection points are the ceiling joists or trusses, not the drywall.
A practical rule is to distribute weight evenly across a shelf. Never place all the heavy items on one end, as this creates uneven stress on the brackets. For freestanding shelving units, secure them to the wall even if they seem stable; this prevents tipping during earthquakes or if someone accidentally bumps into them. When in doubt, consult the manufacturer's specifications and, if necessary, ask a professional for an assessment.
Smart Storage Solutions: Shelving, Bins, and Overhead Racks
Once your walls are handling the daily-use tools, the remaining items need a home on shelves or in overhead space. Smart storage solutions are about matching the container to the item, not just buying more bins.
Freestanding Shelving: The Workhorse
For bulky and heavy items, freestanding metal shelving is the workhorse of the garage. The two most common types are:
- Adjustable metal shelving (e.g., the classic 72-inch, 4-shelf unit): These units typically have a rated capacity of 175-200 pounds per shelf when the weight is evenly distributed. The shelves are adjustable in 1-inch increments, which lets you configure the space to fit tall items like a floor jack or short items like paint cans. Look for units with a "rivet" or "clip" style connection rather than plastic shelf clips, which can fail under heavy loads. A 72-inch unit is a cost-effective solution.
- Foldable metal storage racks with wheels: These are a newer option, typically rated for 150-175 pounds per shelf. The wheels make them ideal for seasonal cleanups or temporary project staging, but they are less stable than fixed units. If you choose a wheeled rack, lock the wheels before loading and secure the rack to the wall with the included anti-tip bracket.
A critical safety rule applies to all freestanding shelving: always secure the unit to the wall. Even a 200-pound shelf can tip forward if you lean a heavy item against it or if a child climbs the lower shelf. Use the manufacturer's wall anchor kit or purchase a universal anti-tip kit for about $10.

Storage Bins: Clear, Labeled, and Stackable
For smaller items, clear plastic storage bins are superior to cardboard boxes because you can see the contents without digging. The best bins for garage use are:
- 12-gallon clear totes (e.g., Sterilite or IRIS): These are the standard for seasonal decor and bulk purchases. They stack securely and cost $8-$12 each. Choose bins with a gasket seal if you live in a humid climate, as this prevents moisture from damaging tools or fabrics.
- Shoe-box-sized clear bins (6-quart): These are perfect for small parts, fasteners, and electrical supplies. They stack neatly on a shelf and cost about $3 each.
Label every single bin on the front and the top. A label maker is a worthwhile investment, but masking tape and a permanent marker work just as well. The label should state the category (e.g., "Holiday Lights") and, for multi-bin categories, a number (e.g., "Christmas Decor 1 of 3"). This numbering system is the foundation of a simple inventory system: keep a list on your phone or a clipboard that says what is in each numbered bin.
Overhead Racks: The High-Capacity Solution
For items you access less than twice a year, holiday decorations, camping gear, or off-season tires, overhead racks are the single best way to reclaim floor space. A typical 4x8-foot overhead rack can hold 250-600 pounds, depending on the model and how it is mounted.
Here is what you need to know before installing an overhead rack:
- Ceiling structure matters. Your garage ceiling is framed with either trusses (common in homes built after 1970) or rafters. Trusses are engineered for specific loads, and hanging 600 pounds from them may exceed their design. Rafters are typically stronger. Before buying a rack, inspect your ceiling: if you see a web of 2x4s forming a triangle pattern, you have trusses. If you see large beams running the length of the garage with smaller joists between them, you have rafters. When in doubt, consult a structural engineer or your local building department.
- Mount to the joists, not the drywall. The rack's mounting brackets must be lag-screwed into the ceiling joists or truss chords. Use 3/8-inch lag bolts that are at least 3 inches long. Never use drywall anchors or toggle bolts for an overhead rack.
- Choose the right rack. There are various brands available. Some models are rated for 250 pounds, while others can hold up to 600 pounds. Some racks even feature a cable-and-pulley system that lets you lower the rack to floor level for loading, which is a significant convenience if you are storing heavy totes.
- Load it correctly. Distribute weight evenly across the rack's surface. Place the heaviest items (e.g., totes of tools) closest to the mounting brackets, not in the center of the rack. Never exceed the manufacturer's rated capacity.
The Inventory Template: A Simple Tracking System
To avoid the "I know it's in here somewhere" problem, create a simple inventory list. On a sheet of paper or a notes app on your phone, create a table with three columns: Bin Number, Contents, and Location. For example:
| Bin # | Contents | Location |
|---|---|---|
| 1 | Christmas lights | Overhead rack, back left |
| 2 | Ornaments | Overhead rack, back left |
| 3 | Camping stove | Shelf 2, left side |
Update the list whenever you add or remove an item. This 10-minute habit eliminates the need to dig through every bin to find a single item.
Your Garage Organization Checklist for a Clutter-Free Space
To bring everything together, use this garage organization checklist to ensure you have not missed a critical step. This is your final walkthrough before you call the project done.
- Zone Verification: Confirm every category has a designated zone and that items are stored in their assigned area.
- Wall Audit: Check that all wall-mounted items are secured into wall studs with appropriate mounting hardware.
- Weight Check: Ensure heavy items are on lower shelves and that weight is distributed evenly across all shelving units.
- Labeling: Verify that all storage bins are labeled on the front and top with their contents.
- Floor Plan: Confirm that all zones are accessible and that you have a clear walking path.
- Tool Storage: Ensure all hand tools and power tools are stored off the floor, either on pegboard, slatwall, or in a dedicated toolbox.
- Hazardous Materials: Check that paints, chemicals, and fuels are stored in approved containers and out of reach of children.
- Bike and Sports Gear: Confirm bikes are on wall hangers or overhead racks, not leaning against the car.
Maintenance and Seasonal Rotation: Keeping It Organized
The final phase is the one that ensures your hard work lasts. A garage is a living space, and without a maintenance routine, it will slowly revert to chaos. The solution is a simple seasonal rotation schedule.
Twice a year, at the start of spring and fall, schedule a 30-minute garage refresh. Walk through your zones and identify any items that have migrated to the wrong place. Return them to their designated spots and take note of any new items that need a permanent home. This is also the time to rotate seasonal gear: move the snow blower to the back of the garage in spring and bring the lawn mower forward.
Seasonal rotation is also the perfect opportunity to assess your storage needs. If you find yourself constantly moving one item out of the way to reach another, it needs a better location. If a shelf is overflowing, it is time to purge again or add another unit. By treating your garage organization as an ongoing system rather than a one-time project, you maintain a clutter-free space that is always ready for your next project.
For those ready to tackle bulk storage or need additional space for seasonal items, consider a dedicated outdoor storage shed. A 10x10 FT Outdoor Storage Shed from Superior Tool Garage and Outdoors offers a weatherproof, rodent-proof solution for lawn equipment and garden tools, freeing up significant garage floor space. For heavier loads inside the garage, the 72" Adjustable Metal Shelving provides strong, configurable storage that keeps weight off the floor and your space organized.

A disorganized garage drains time and energy from every project you start. The solution is not a bigger space; it is a smarter layout that respects how you work. By following the phases of decluttering, zoning, and vertical storage, and by choosing heavy-duty solutions built to last, you can turn your garage into a functional workshop. Superior Tool Garage and Outdoors carries the storage racks, shelving, and outdoor sheds you need to get the job done right. Shop now and reclaim your garage this weekend.
Frequently Asked Questions
What are some easy DIY organization ideas for my garage?
Start with these projects: install a pegboard for frequently used hand tools, mount heavy-duty shelving units along one wall for bins, and use wall studs to hang bikes vertically. For a quick win, add clear storage bins with labels on your new shelves. These projects require basic tools and a drill, and they immediately free up floor space. Focus on one wall at a time to avoid feeling overwhelmed.
How do I start organizing my garage?
Begin by pulling everything out and sorting items into four piles: keep, donate, sell, and trash. Measure your garage's wall space and ceiling height next. Then, create a simple zone plan for the items you're keeping, such as tools, sports gear, and seasonal decor. Use our garage organization checklist to track your progress before you buy any storage products.
What are common garage organization mistakes?
The biggest mistake is buying storage before decluttering. Another is overloading shelves beyond their weight capacity, which is a safety hazard. Many people also forget to plan for large, awkward items like ladders and bikes. Finally, failing to label bins leads to frustration later. Avoid these by measuring first, checking load limits, and using a labeling system from day one.
How do I maximize vertical space in a small garage?
Use the full height of your garage. Install wall-mounted slatwall or pegboard for tools, and place heavy-duty shelving high up for seasonal bins. Overhead racks are ideal for bulky but light items like empty totes. For bikes, use wall hooks that engage the frame. A 72-inch adjustable metal shelving unit can double your storage capacity without sacrificing floor space.
What is the best way to store holiday decorations in the garage?
Store decorations in clear, stackable bins with detailed labels on two sides. Place the bins on upper shelves or an overhead rack since you only need them a few times a year. Wrap string lights around cardboard to prevent tangling. Keep a bin inventory list on your phone or on the outside of your storage area so you know exactly what is up there.
How much weight can garage wall storage hold?
It depends on your wall studs and mounting hardware. A standard stud can typically support 50 to 100 pounds when you use a proper lag bolt. Drywall anchors alone hold far less, usually 20 to 40 pounds. Always screw heavy-duty shelving and slatwall directly into wall studs. For very heavy items, a freestanding metal rack distributes the load to the floor.