


Table of Contents
- What You'll Need Before You Start
- Planning Your DIY Garden Tool Rack for Shed Walls
- Garden Tool Rack Plans: Measuring and Marking Your Layout
- Cutting and Assembling Your Rack Frame
- Installing a Garden Tool Hanging Rail and Hooks
- Long-Handled Garden Tool Storage Solutions
- Shed Organization Ideas for Maximum Accessibility
- Protecting Your Rack: Moisture, Rust, and Maintenance
- Frequently Asked Questions
Last Updated: October 18, 2026
What You'll Need Before You Start
A DIY garden tool rack needs 2x4s or reclaimed timber, wood screws, wall anchors rated for your shed, hooks or rails sized to your tools, plus a tape, level, drill, saw, and pencil.
The 50 Piece General Household Toolbox from Superior Tool Garage and Outdoors includes many essentials you'll need, a measuring tape, drill bits, screwdrivers, and a hammer, all for $33.99.

Plan around your inventory: long-handled tools need vertical space, hand tools need hooks or rails, and power tools suit a lower shelf.
| Item | Purpose | Typical Cost |
|---|---|---|
| Wood boards (2x4s) | Frame structure | $15-30 |
| Wood screws | Assembly | $5-10 |
| Wall anchors | Mounting security | $5-15 |
| Hooks and rails | Tool hanging | $10-25 |
| Drill/driver | Installation | Varies |
Planning Your DIY Garden Tool Rack for Shed Walls
Choosing a location and measuring wall space
Pick an accessible wall off the main walking path; a section at least 4 feet wide and 6 feet tall suits most garden tools.
Check for windows, outlets, and structural supports, avoid spots where moisture pools or rain blows in, and keep marks level.
A side or back wall usually works better than near the entrance, where you'd bump into the rack constantly.
Selecting materials: wood and reclaimed timber options
Wood is the most practical choice for a DIY garden tool rack. Standard 2x4s work fine and cost little; reclaimed timber adds character.
Inspect reclaimed timber for rot, insect damage, or deep cracks, and sand rough surfaces. Older wood splits easily, so pre-drill before screwing.
Pressure-treated wood resists moisture better in a damp shed; untreated wood needs sealing or paint.
Garden Tool Rack Plans: Measuring and Marking Your Layout
Most rack guides stop at "space your rails 12 to 18 inches apart," leaving you to guess the cut list. This plan is dimensioned to build as-is on a standard 4-foot shed wall.
A dimensioned cut list for a 4-foot rack
This plan builds a 48-inch-wide, 72-inch-tall wall rack from 2x4 lumber. It holds long-handled tools on the upper rails and hand tools on the lower rails.
| Piece | Quantity | Dimensions (actual) | Purpose |
|---|---|---|---|
| Vertical side rails | 2 | 1-1/2 in x 3-1/2 in x 72 in | Outer frame, carries the load to the wall |
| Horizontal top rail | 1 | 1-1/2 in x 3-1/2 in x 45 in | Fits between side rails; top hanger |
| Horizontal mid rail | 1 | 1-1/2 in x 3-1/2 in x 45 in | Fits between side rails; hand-tool hanger |
| Horizontal bottom rail | 1 | 1-1/2 in x 3-1/2 in x 45 in | Fits between side rails; low hanger or shelf cleat |
| Wall cleats | 2 | 1-1/2 in x 3-1/2 in x 48 in | Screw to wall studs; frame attaches to these |
| Diagonal brace (optional) | 1 | 1-1/2 in x 3-1/2 in x 20 in | Cut at 45 degrees; stiffens the frame |
Actual 2x4s measure 1-1/2 by 3-1/2 inches, so 45-inch horizontals plus two 1-1/2-inch side rails equal 48 inches overall. Check pre-cut studs with a tape, since nominal 2x4s vary.
How to adjust the plan for your wall and tools
- Narrower wall (24 to 36 inches): Drop one vertical side rail and shorten the horizontals to fit. Keep at least two wall cleats and three mounting points per cleat.
- Wider wall (6 to 8 feet): Add a third vertical side rail at the midpoint and shorten each horizontal span to about 45 inches. Spans longer than about 48 inches sag under heavy tools.
- Taller tools: Measure your longest handle from tip to grip (a shovel is 48 to 60 inches, a rake 54 to 66). Set the top rail so the tool head clears the floor by 2 to 4 inches when hung.
Rail spacing that matches real tool handles
Spacing depends on what hangs where, not on a single rule:
- Long-handled tools (shovels, rakes, hoes, brooms): 12 to 18 inches between the top and mid rails. Hangers or slots should be 6 to 8 inches apart horizontally so heads don't collide.
- Hand tools (trowels, pruners, hand forks): 8 to 12 inches between the mid and bottom rails. Hooks every 4 to 6 inches give you room for individual tools.
- Power tools and batteries: Reserve the bottom rail or a low shelf. A string trimmer or leaf blower is bulky and heavy; keep it below waist height.
Marking the layout on the wall
- Find the studs first. Shed walls are framed at 16 or 24 inches on center. Mark each stud center; a stud finder is faster, but on an older shed confirm with a 1/16-inch test hole.
- Snap a level line for the top cleat. Set the top cleat so the top rail sits at about 68 to 72 inches above the floor, high enough for long tools, low enough to reach.
- Mark the bottom cleat at 6 to 12 inches above the floor, or high enough that the longest tool head clears the floor.
- Mark mounting points on each stud at the cleat lines. Two fasteners per stud per cleat is the minimum; three is better on 24-inch spacing.
- Check for obstacles, outlets, windows, and door swings, before you drill. Shift the whole layout rather than notching around an obstacle.
Load planning by the numbers
A 2x4 frame anchored into at least three studs with 3-inch structural screws can typically support 150 to 200 pounds distributed across the rack, a planning estimate, not a rating, since wall, fasteners, and stud condition all matter. For reference:
- A long-handled shovel weighs about 5 to 8 pounds.
- A gas string trimmer weighs about 10 to 15 pounds.
- A typical rake weighs 3 to 5 pounds.
Add up what you plan to hang. If the total is more than about 100 pounds, add a third wall cleat and a diagonal brace, and put the heaviest items on the bottom rail where the frame is strongest.
Cutting and Assembling Your Rack Frame
Cut your 2x4s to length with a circular saw or handsaw, or ask for cuts at the hardware store.
Drill pilot holes to prevent splitting, use galvanized or stainless screws, and drive at least two fasteners per joint.
Build the outer frame flat on the ground, add rails, then move it to the wall. A 21V Cordless Drill/Driver Kit makes this much faster than hand drilling.

Check the frame with a level as you build, small angles compound under weight, and a wobbly frame lets tools shift and fall.
Installing a Garden Tool Hanging Rail and Hooks
Mounting securely to shed walls
Shed walls are often thinner than house walls, so use heavy-duty anchors rated for your wall type: plastic expansion anchors for wood-frame sheds, toggle bolts for metal sheds.
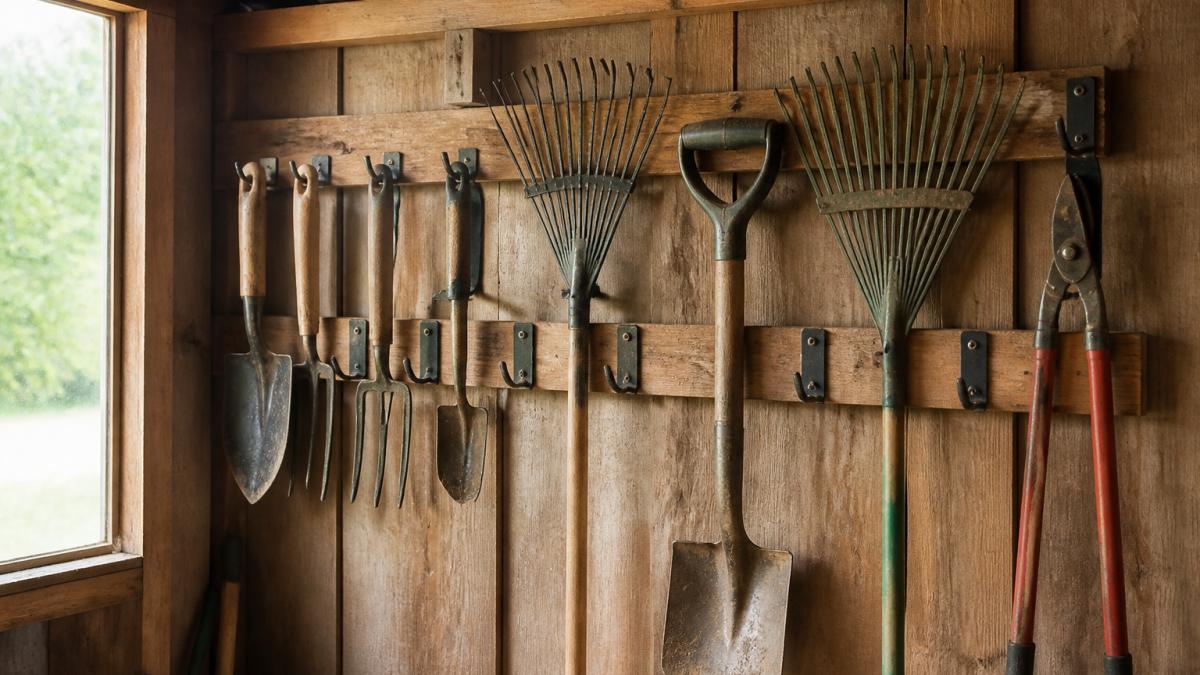
Locate studs or frame members where possible, they're the strongest anchor points. If studs don't align with your plan, heavy-duty anchors still work.
Drill pilot holes to guide your anchors and prevent splitting, insert the anchors, then screw in your brackets.
Use at least three mounting points per horizontal rail to spread the load and prevent sagging.
Load capacity and wall anchoring for safety
Put heavy gas-powered equipment low, light hand tools higher.
50 Piece General Household Toolbox →
Test before loading fully: hang your heaviest tools one at a time and watch for sagging.
Wood expands and contracts with moisture and temperature, so fasteners loosen. Check the rack twice a year, tighten loose screws, and replace rusted anchors.
Never exceed an anchor's rated weight, anchors fail suddenly and falling tools are dangerous. When in doubt, add more anchors.
Long-Handled Garden Tool Storage Solutions
Long-handled tools, shovels, rakes, hoes, brooms, edgers, string trimmers, make most sheds feel cramped. Leaning them in a corner wastes floor space, dulls edges, and creates a trip hazard. Storing them vertically by the handle, head up, solves all three.
Store by the handle, not the head
Hang long-handled tools from the handle just below the grip, with the head up. This:
- Protects the edge. A shovel or hoe blade resting on a concrete floor dulls and rusts at the edge. Hanging head-up keeps the working edge off the floor.
- Keeps the grip clean. Handles stay dry and free of floor moisture.
- Makes the tool easy to grab. You reach for the handle at chest or shoulder height, not the dirty head.
A simple U-shaped hook or a pair of screw-in utility hooks spaced 2 to 3 inches apart holds most handles. For heavier tools, use a 2x4 cradle with a 1-1/2-inch-deep notch.
Spacing and slot design by tool type
| Tool | Typical handle length | Recommended slot width | Placement |
|---|---|---|---|
| Shovel / spade | 48-60 in | 3-4 in | Bottom rail, head up |
| Garden rake | 54-66 in | 4-5 in (head is wide) | Mid rail, tines facing wall |
| Hoe | 48-60 in | 3-4 in | Mid rail, blade down or sideways |
| Broom | 48-54 in | 3-4 in | Top rail, bristles down |
| String trimmer | 40-48 in | 5-6 in or a dedicated hook | Bottom rail, motor down |
| Edger | 48-54 in | 3-4 in | Mid rail, blade guarded |
Space slots 6 to 8 inches apart on center. Wider spacing wastes wall space; tighter spacing lets wide rake heads and shovel blades collide when you pull a tool out.
Safe placement for sharp blades and heavy heads
- Point edges toward the wall, not the walkway. A hoe or edger blade should face the wall so a brushed hand doesn't catch the edge.
- Guard exposed edges. A short length of garden hose slit lengthwise and slipped over a shovel or edger blade protects the edge and your shins.
- Put the heaviest heads low. A gas-powered trimmer or a heavy mattock belongs on the bottom rail, where the frame is strongest and a fall is shortest.
Handle grips, padding, and rust control
Wooden handles dry out and splinter; fiberglass cracks if pinched. Line each hook or notch with rubber weatherstripping or old inner tube to grip the handle.
Metal heads rust in an unheated shed. Wipe blades with a light coat of oil before hanging for the season, and keep the rack away from the dampest corner. A small fan or top vent moves enough air to keep condensation off the steel.
A quick layout for a 4-foot rack
On a 48-inch-wide rack with three horizontal rails:
- Top rail (about 68 inches high): brooms and short-handled tools.
- Mid rail (about 48 inches high): rakes, hoes, and edgers, the tools you grab most often.
- Bottom rail (about 12 inches high): shovels, spades, and the string trimmer.
That layout puts the heaviest heads lowest, keeps sharp edges away from eye level, and leaves the mid rail at the most comfortable reach height. If you store more than eight long-handled tools, add a second vertical section rather than crowding one rail.
Shed Organization Ideas for Maximum Accessibility
Group similar tools together. All digging tools in one section, all cutting tools in another.
Label your rack sections with a label maker or paint pen so family members return tools to the right spot and borrowed items are obvious.
Leave some empty space. A packed rack is hard to use. You need room to grab a tool without bumping others.
Consider adding a small shelf for battery chargers, gloves, or small supplies.
Protecting Your Rack: Moisture, Rust, and Maintenance
Sheds are damp places. Wood absorbs moisture and rots over time. Metal rusts.
Paint or stain your wooden rack every 2-3 years. Sand lightly between coats so it sticks.
Metal hooks and rails rust, especially in humid sheds.
Improve shed ventilation to reduce moisture.
Check your rack seasonally.
Building a garden tool rack for your shed transforms wasted wall space into organized, accessible storage.
Frequently Asked Questions
How do you make a garden tool rack for a shed?
Build a frame from wood or reclaimed timber, attach a hanging rail or hooks to the front, then mount it securely to your shed wall using appropriate fasteners. Measure your wall space first, mark stud locations, cut your materials, assemble the frame, add hooks or rails for hanging tools, and use lag bolts or heavy-duty wall anchors to mount it. The 50 Piece General Household Toolbox ($33.99) includes the measuring tape and fasteners you'll need to get started.
What materials work best for a DIY garden tool rack?
Wood and reclaimed timber are ideal because they're affordable, easy to work with, and blend naturally into shed environments. Solid wood handles moderate loads well, while reclaimed timber adds character. Metal rails and hooks provide durability and rust resistance when properly treated. Avoid soft woods that absorb moisture; opt for pressure-treated lumber or cedar for outdoor sheds where humidity is high.
How do you keep long-handled garden tool storage organized and accessible?
Use a combination of vertical hanging rails and angled slots to accommodate different tool lengths. Mount the rack at chest height so you can grab tools without bending or reaching overhead. Group tools by type: shovels and spades together, rakes and hoes in another section. Leave 12-18 inches between hook positions to prevent tools from tangling.
How far apart should hooks be on a garden tool rack?
Space hooks 12-18 inches apart horizontally to prevent tools from hitting each other and to give you room to grab them easily. Vertical spacing depends on tool head sizes; typically 6-8 inches between rows works well for most hand tools and smaller implements. For long-handled tools like rakes and shovels, angle the rack slightly or use a rail system that lets tools lean at an angle, requiring less horizontal space while keeping them stable and accessible.