


Table of Contents
- Why Concrete Floors Damage Outdoor Gear
- Prepare Your Concrete with a Garage Floor Moisture Barrier
- Elevate Gear Off the Concrete Floor
- Choose the Best Garage Storage Racks for Heavy Gear
- Clean and Prepare Gear Before Storage
- Control Moisture and Prevent Mold on Camping Gear
- Protect Metal Components from Rust and Corrosion
- Manage Pests and Environmental Hazards
- Frequently Asked Questions
Last Updated: August 21, 2026
Why Concrete Floors Damage Outdoor Gear
Concrete is porous. Water moves through it constantly, traveling upward from the ground through capillary action. This moisture wicks into anything sitting directly on the surface, tent fabric absorbs it, metal components rust, and gear develops mold within weeks (the CDC).
The damage accelerates in seasonal storage. Your camping tent, kayak paddles, or bike tires experience temperature swings that cause condensation. Warm air hits cold concrete and releases moisture directly onto your equipment. Over time, this cycle degrades synthetic materials, corrodes metal, and creates an environment where mold growth becomes inevitable.
Most homeowners don't realize concrete floor sealing is the foundation of any storage strategy. Without it, every other effort, elevated racks, dehumidifiers, storage containers, becomes a band-aid on a larger problem. The moisture keeps coming. The concrete keeps wicking. Your gear keeps deteriorating.
This is where proper preparation changes everything. Sealing the concrete floor stops moisture at the source, creating a dry foundation for all your outdoor equipment storage needs.
Prepare Your Concrete with a Garage Floor Moisture Barrier
A moisture barrier is the single most important step when storing outdoor gear on concrete floors. It's not optional, it's foundational. Without it, humidity levels inside your garage remain elevated, and moisture continues rising through the concrete regardless of what you place on top.
The barrier works by creating a vapor seal between the concrete and the air above it. This stops capillary rise and dramatically reduces the moisture available to damage your equipment. Think of it as giving your concrete floor a waterproof skin.
Before applying any barrier, clean the concrete thoroughly. Sweep away all debris, then use a pressure washer to remove dirt, oil, and loose material. Let it dry completely, at least 24 hours in dry conditions. Any moisture trapped under the barrier defeats the entire purpose.
DIY Floor Sealing Options
For most homeowners, a concrete sealer is the most practical solution. Acrylic sealers are budget-friendly and apply easily with a roller or sprayer. They create a protective layer that reduces moisture penetration significantly. Expect to reapply every 2-3 years, but the cost remains low and the process stays simple.
Epoxy coatings offer stronger, longer-lasting protection. They bond chemically to the concrete and create a more durable surface that resists moisture, chemicals, and wear. Epoxy requires more careful application, surface preparation must be precise, and you need to follow mixing and curing instructions exactly. The trade-off is worth it: epoxy lasts 5-10 years with minimal maintenance (peer-reviewed research).
Polyurethane sealers split the difference. They're more durable than acrylic but easier to apply than epoxy. They handle moisture well and provide decent longevity. If you want reliable performance without the complexity of epoxy, polyurethane is a solid choice.
For budget-conscious storage, even a basic concrete sealer makes a measurable difference. The key is application: two thin coats work better than one thick coat. Allow proper drying time between coats. Rushing this step means the barrier won't fully cure, and moisture will still penetrate.
When to Call a Professional
If your concrete shows significant cracks, spalling, or existing water damage, professional assessment makes sense. Professionals can identify structural issues that DIY sealing won't fix. They also have access to commercial-grade products and equipment that deliver superior results.
For garages with chronic moisture problems, standing water, efflorescence (white powder on the surface), or persistent dampness, professional moisture control systems may be necessary. These might include interior drainage systems or vapor barriers that go beyond simple sealing.
The cost of professional application ranges based on garage size and product choice, but the investment pays back through years of protected storage. If you're uncertain whether your concrete needs professional treatment, a consultation costs little and provides clarity.
Elevate Gear Off the Concrete Floor
Elevation is your second line of defense. Even with a sealed floor, keeping gear physically separated from the concrete surface reduces direct contact with any residual moisture and improves air circulation underneath.
This principle applies to everything: bikes, camping equipment, kayaks, tools. The goal is simple, get it off the ground. Air needs to flow beneath your stored items. When gear sits directly on concrete, moisture pools underneath, creating a microclimate that accelerates mold growth and corrosion.
Budget-Friendly DIY Elevation Methods
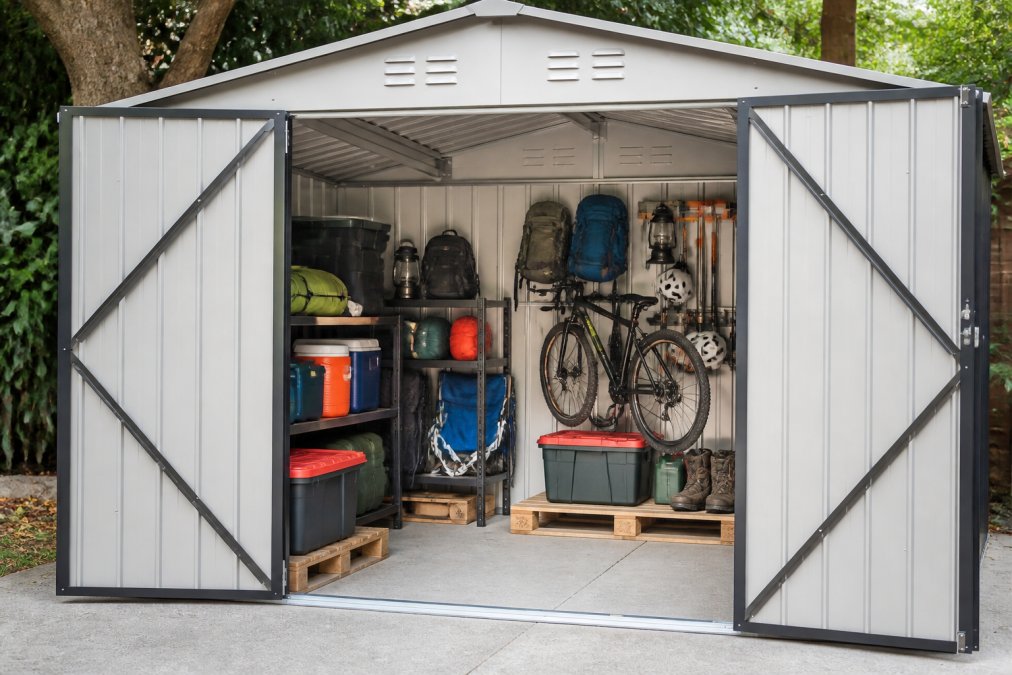
Wooden pallets are the most accessible option. They're often free or cheap, and they lift gear 4-6 inches off the floor. The gaps in pallet construction allow air circulation underneath. Downside: wood absorbs moisture and can rot over time. Treat pallets with a water-resistant sealant before use, or replace them every few years.
Concrete blocks or cinder blocks create simple, durable supports. Stack two blocks and place a wooden board across them to create a platform. This method costs almost nothing and lasts indefinitely. The blocks don't absorb moisture, and the setup is infinitely adjustable.
PVC pipe frameworks are lightweight and moisture-resistant. Build a simple frame using PVC pipes and connectors, then add wooden shelves or wire racks on top. This approach gives you customizable height and spacing. It requires basic assembly skills but costs less than metal shelving.
Interlocking plastic tiles designed for garage floors create modular platforms. They're more expensive than pallets or blocks but professional-looking and easy to reconfigure. They handle moisture well and provide stable support for heavier gear.
For most homeowners, a combination works best: use pallets or blocks for lightweight seasonal items, and invest in one or two metal shelving units for gear you access frequently.
Choose the Best Garage Storage Racks for Heavy Gear
Heavy gear needs proper support. Bikes, kayaks, and full camping setups strain cheap shelving. Metal storage racks designed for heavy loads provide the durability and stability your equipment demands.

Look for racks with weight ratings that exceed your actual load. If you're storing a 50-pound kayak plus other gear, choose a rack rated for at least 100 pounds per shelf. This safety margin prevents sagging and collapse over time.
Adjustable shelving gives you flexibility as your storage needs change. Metal racks with bolt-together construction allow you to customize shelf height and add or remove shelves. This adaptability makes sense for long-term storage solutions.
For storing outdoor gear on concrete floors, galvanized or powder-coated metal prevents rust. The protective finish handles garage humidity far better than bare steel. Check that all bolts and fasteners are also treated, rust can start at connection points if hardware isn't protected.
Consider vertical space as much as floor space. Tall racks that reach 6-7 feet maximize storage without consuming valuable garage floor area. Wall-mounted racks work well for lighter items and free up floor space entirely.
Superior Tool Garage and Outdoors offers heavy-duty storage solutions designed specifically for this purpose. Their metal storage sheds provide weatherproof, dedicated space for seasonal gear. The 10x10 FT Outdoor Storage Shed starts at $273.99 and handles moisture, pests, and temperature swings that would damage gear stored in a basic garage. For larger collections, the 10x12FT Outdoor Metal Storage Shed at $864.99 provides ample space with full environmental protection.

Clean and Prepare Gear Before Storage
Dirty gear deteriorates faster. Mud, salt, and organic debris trap moisture and provide food for mold. Cleaning before storage isn't optional, it's maintenance that extends equipment lifespan.
For camping gear, remove all dirt and debris. Wipe down tent fabric with a dry cloth. Air out sleeping bags in sunlight for several hours. Let all moisture evaporate completely before packing anything away.
Bikes need attention to metal components. Wipe down the frame and chain to remove road salt and grime. Light oil on the chain prevents rust during storage. Don't store a wet bike, dry it completely first.
Kayaks and paddles should be rinsed with fresh water if they've been in saltwater. Let them dry thoroughly. Store paddles vertically to prevent warping. For kayaks, use padded supports that distribute weight evenly, concentrated pressure points can crack plastic over time.
Gear maintenance before storage prevents problems that emerge months later. A few minutes of cleaning now saves hours of restoration later.
Control Moisture and Prevent Mold on Camping Gear
Even with sealed floors and elevated storage, humidity control remains essential. Moisture in the air settles on cool surfaces and feeds mold growth. Managing humidity levels directly protects your investment.
Target humidity between 30-50 percent inside your storage space (the EPA). Above 50 percent, mold spores activate and begin colonizing fabric and organic materials. Below 30 percent, some materials become brittle, but this is far less common in typical garage storage.
Dehumidifiers and Air Circulation
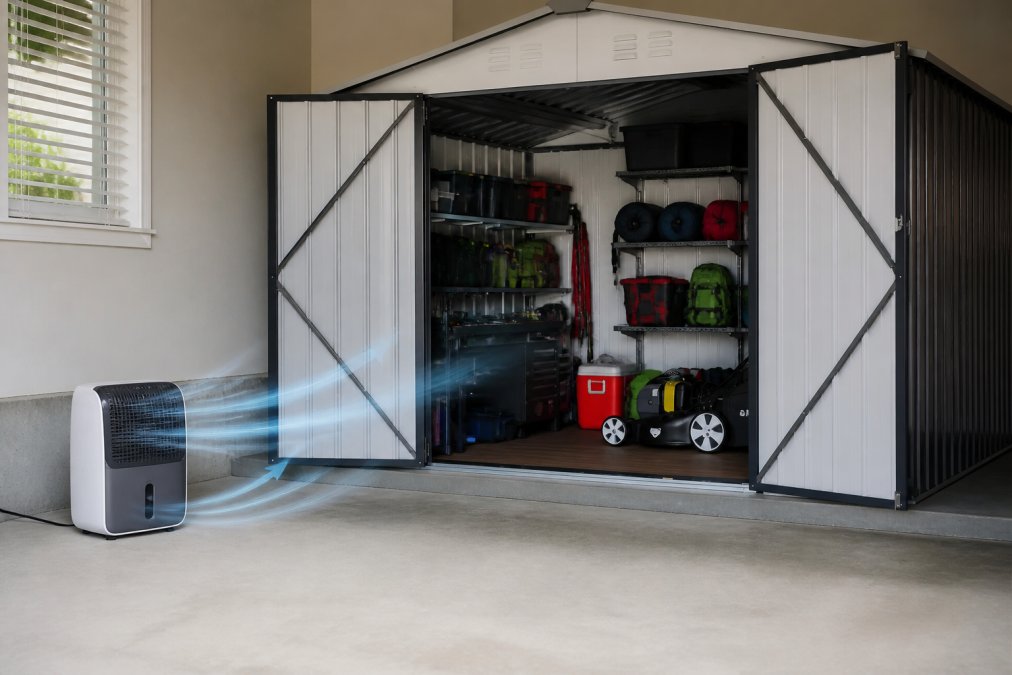
A dehumidifier removes moisture from the air continuously. Portable units work well for garages and sheds. Choose a model sized for your space, a small dehumidifier in a large garage won't keep up with moisture loads.
Run the dehumidifier during humid seasons. In summer months when outdoor humidity spikes, continuous operation may be necessary. In winter, you can reduce runtime or shut it off entirely, depending on your climate.
Air circulation works alongside dehumidification. A simple box fan or portable circulation fan keeps air moving, preventing dead zones where moisture accumulates. Position fans to create airflow across stored gear, stagnant air is where mold thrives.
Storage Containers and Vapor Barriers
Sealed storage containers with desiccant packs create microenvironments that protect individual items. Silica gel packets or activated charcoal absorb moisture inside the container. Replace desiccants every 3-6 months depending on humidity levels in your garage.
Vapor barriers, plastic sheeting or moisture-resistant fabric, wrap around gear to block direct contact with humid air. This works particularly well for seasonal items stored for months at a time. The barrier reduces moisture transfer without completely sealing the item (which can trap condensation if not done correctly).
For tents and sleeping bags, breathable storage bags are better than airtight plastic. Breathable fabric allows some air exchange while still blocking direct moisture contact. Completely sealed bags can trap condensation inside, creating the exact problem you're trying to prevent.
Combining methods works best: sealed floor, elevated storage, dehumidifier running during humid months, and individual items in breathable containers. This layered approach handles moisture from every angle.
Protect Metal Components from Rust and Corrosion
Metal rusts when exposed to moisture and oxygen. Bike frames, kayak hardware, tool components, anything metal needs protection during storage.
Wipe metal surfaces with a light coat of oil before storing. This creates a barrier between the metal and humid air. Use general-purpose machine oil or specialized storage oils. Don't oversaturate, a thin, even coat is enough.
For bikes and tools, silica gel packets stored nearby absorb ambient moisture. Replace them regularly. For high-value items, individual oiled cloth wraps provide targeted protection.
Stainless steel components resist rust naturally but can still corrode in high-humidity environments. Even stainless benefits from a light oil coating during long storage periods.
Rust prevention is easier than rust removal. A few minutes of preparation prevents hours of restoration work later. This applies to all metal components in your stored gear.
Manage Pests and Environmental Hazards
Rodents and insects exploit storage spaces. Sealed containers and elevated storage make intrusion harder, but vigilance remains necessary.
Keep food and organic materials away from storage areas. Rodents are attracted to seeds, dried food, and plant material. Store these items in airtight containers in a separate location if possible.
Regular inspection catches problems early. Check stored gear monthly during storage season. Look for droppings, gnaw marks, or nesting material. Early detection allows you to address infestations before they damage equipment.
Pest control measures include snap traps placed strategically around the storage area, not directly on gear. Peppermint oil-soaked cotton balls placed near storage containers deter some rodents naturally. Commercial rodent repellents work as well, but follow label instructions carefully around stored gear.
Insects like silverfish and carpet beetles damage fabric. Mothballs or cedar blocks placed in storage containers help, though they require adequate ventilation to prevent odors from overwhelming the space.
Environmental hazards include temperature extremes and UV exposure. Keep gear away from windows where sunlight degrades fabric and plastic. In very cold climates, allow gear to acclimate to room temperature before use after storage, sudden temperature changes can cause condensation and material stress.
Storing outdoor gear on concrete floors requires a systematic approach: seal the foundation, elevate your equipment, control moisture, and maintain your gear before storage. Each step builds on the previous one, creating an environment where your investment stays protected for years.
Superior Tool Garage and Outdoors provides the storage solutions that make this system work. From the sealed foundation to elevated racks and weatherproof sheds, their heavy-duty equipment handles the demanding conditions of seasonal storage. The 10x8FT Steel Garden Storage Shed at $649.99 offers a complete solution for serious gear collectors, while the 12x18FT Metal Storage Shed at $687.99 provides space for extensive collections. Start with proper floor preparation and the right storage infrastructure, your gear will thank you.

Frequently Asked Questions
Q: Why is storing outdoor gear directly on concrete a bad idea?
A: Concrete absorbs moisture from the ground through capillary action, creating a damp environment that promotes mold growth, mildew, and fabric degradation. Metal components rust faster, and synthetic materials can weaken over time. Elevated storage and moisture barriers prevent direct contact between gear and the concrete's moisture-wicking surface, extending your equipment's lifespan significantly.
Q: What's the best way to create a garage floor moisture barrier?
A: Epoxy coating is a durable DIY option, it seals the concrete and prevents moisture vapor from rising. Clean the floor thoroughly, apply a concrete primer, then roll on epoxy in thin, even coats. Alternatively, use interlocking tiles or a vapor barrier membrane for faster installation. Professional sealing offers longer-lasting results but costs more upfront.
Q: How do I prevent mold on camping gear stored in my garage?
A: Combine three strategies: use a dehumidifier to keep humidity below 50%, ensure air circulation with fans or open vents, and store gear in breathable containers or sealed bins with desiccant packets. Clean all gear before storage to remove organic material that feeds mold. For tents and sleeping bags, store them loosely in mesh bags rather than compressed, moisture wicking improves when fabric can breathe.
Q: What's the most budget-friendly way to elevate gear off concrete?
A: Wooden pallets are a cheap option, stack them 4-6 inches high and place gear on top. Concrete blocks or cinder blocks under wooden platforms also work well. For heavier items like bikes or tools, consider basic metal shelving units. Avoid direct wood-to-concrete contact by placing a moisture barrier under pallets first to prevent wood rot and pest entry.