


Table of Contents
- Why Regular Cleaning and Maintenance Extends Power Tool Life
- Step 1: Remove Debris Buildup and Sawdust
- Step 2: Inspect Cords, Cables, and Electrical Safety
- Step 3: Lubricate Moving Parts and Reduce Friction
- Battery Maintenance and Charging Best Practices
- How to Store Power Tools to Prevent Rust and Corrosion
- Power Tool Cleaning Supplies and When to Replace Power Tool Brushes
- Establishing a Power Tool Maintenance Schedule
- Frequently Asked Questions
Last Updated: October 1, 2026
Why Regular Cleaning and Maintenance Extends Power Tool Life
Power tools are investments. A quality cordless drill, impact wrench, or angle grinder can cost hundreds of dollars and should deliver years of reliable performance. Yet many homeowners treat maintenance like an afterthought, they use a tool, toss it in a drawer, and wonder why it fails after a season. This guide from Superior Tool Garage and Outdoors explains how to clean and maintain power tools for longevity, because the difference between a tool that lasts five years and one that lasts fifteen often comes down to simple, consistent care.

The reality is straightforward: debris buildup clogs ventilation slots, moisture causes corrosion, worn brushes reduce efficiency, and neglected batteries degrade faster. Each of these problems is preventable. When you establish a maintenance routine, you're not just extending the tool's life, you're also ensuring it performs at full capacity every time you reach for it. A well-maintained power tool delivers consistent results, requires fewer repairs, and ultimately saves you money.
Step 1: Remove Debris Buildup and Sawdust
Debris accumulation is the silent killer of power tools. Sawdust, dirt, and fine particles work their way into ventilation slots, the housing, and moving parts, restricting airflow and trapping heat. Over time, this causes the motor to work harder, temperatures rise, and components fail prematurely.
Start with compressed air. Use short bursts to blow debris out of the ventilation slots and exhaust ports. Hold the tool at an angle so particles fall away from the motor. For cordless drills and impact wrenches, pay special attention to the chuck area and trigger mechanism, these collect fine dust that can affect operation.
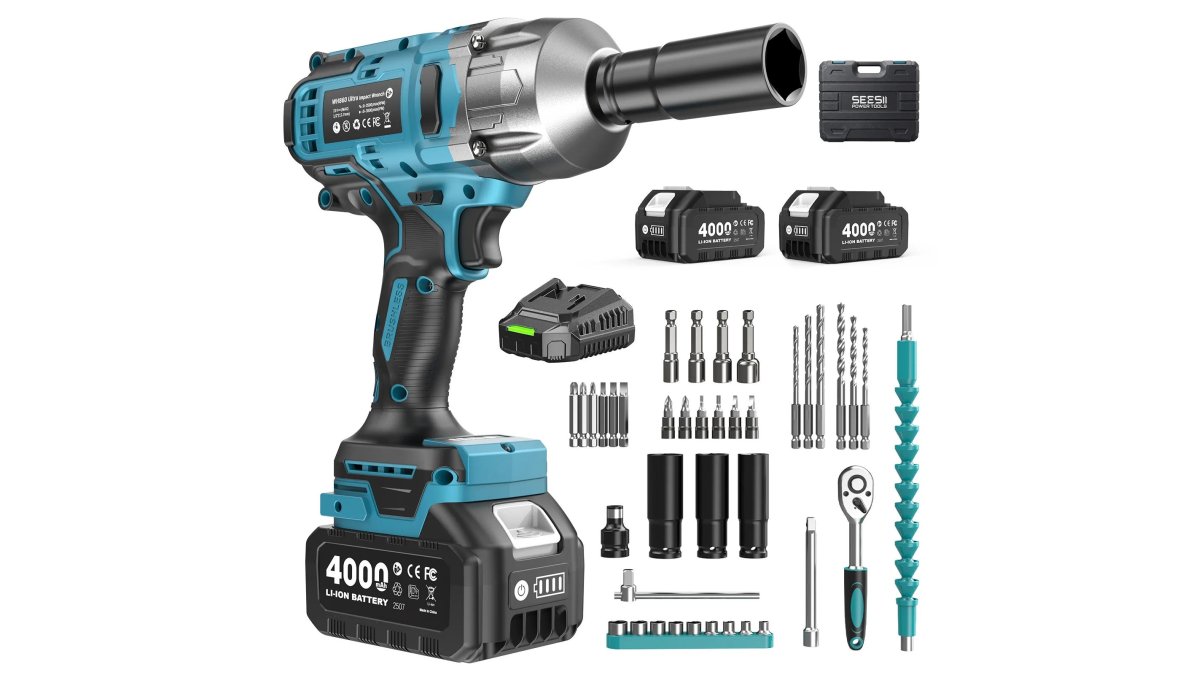
After compressed air, use a soft wire brush or old toothbrush to gently scrub the housing, vents, and any crevices where dust settles. Don't use water at this stage, dry cleaning only. For stubborn buildup around the chuck or motor housing, a small soft-bristle brush works better than compressed air alone. The goal is to remove all loose particles without forcing anything deeper into the tool.

Step 2: Inspect Cords, Cables, and Electrical Safety
Electrical safety determines whether a tool is safe to use. Damaged cords and frayed insulation create shock hazards and can cause tool failure mid-project. Before every use, visually inspect the entire length of the cord or cable for cuts, cracks, or exposed wires.
For corded tools, check where the cable enters the tool body, this is a stress point where damage often occurs first. Flex the cable gently near the connection and look for any signs of strain or cracking in the insulation. If you find damage, stop using the tool immediately. A damaged cord is not worth the risk.
For cordless tools, inspect the battery contacts and charging port. Corrosion or debris on the battery terminals prevents proper electrical connection and can cause the battery to undercharge or fail to charge at all. Use a dry microfiber cloth to gently wipe the contacts clean. If you see green or white corrosion buildup, a slightly damp cloth with a drop of vinegar can help, but dry the contacts thoroughly afterward.
Check that all safety features, guards, trigger locks, and emergency stops, function smoothly. Press the trigger and release it several times to ensure it responds consistently. A sticky trigger can indicate dust infiltration or lubricant breakdown, both of which require attention.
Step 3: Lubricate Moving Parts and Reduce Friction
Moving parts need lubrication to operate smoothly and reduce friction. Without it, components wear faster, efficiency drops, and the tool generates excess heat. However, the type of lubrication matters, and more is not better.
For most power tools, a light machine oil or general-purpose tool lubricant works well. Apply a tiny amount, a single drop, to pivot points, hinge mechanisms, and the chuck. Rotate the chuck by hand a few times to work the lubricant in. Do not over-lubricate. Excess oil attracts dust, creating a gritty paste that damages rather than protects.
For impact wrenches and drills with complex trigger mechanisms, a light lubricant spray (such as a general-purpose tool oil) can be applied directly to the mechanism. Activate the trigger several times to distribute the lubricant. Wipe away any excess with a clean cloth.
Bearings and internal components typically require no user maintenance on modern power tools, they come pre-lubricated from the factory. Attempting to disassemble the tool to reach internal bearings risks damaging seals and voiding any warranty. If a tool develops grinding sounds or unusual vibration, it's a sign the internal bearings need professional service, not home lubrication.
Battery Maintenance and Charging Best Practices
Battery longevity directly affects how long a cordless tool remains useful. Modern lithium-ion batteries are durable, but how you charge and store them determines whether they last three years or eight.
50 Piece General Household Toolbox →
Charge the battery after each use rather than waiting for a complete discharge. Lithium-ion batteries prefer frequent partial charges over deep discharges. If you use a tool for an hour, charge the battery afterward, don't wait until it's completely drained. This charging pattern extends the total number of charge cycles the battery can handle.
Avoid extreme temperatures during storage. Batteries stored in hot garages or freezing sheds degrade faster than those kept at room temperature. If you live in a hot climate, store batteries indoors in a climate-controlled space. In winter, bring batteries inside before they freeze. Cold batteries won't charge properly and may suffer permanent damage.
Check the battery terminals occasionally for corrosion or debris. A clean contact point ensures efficient charging and consistent power delivery. If corrosion appears (white, green, or blue discoloration), wipe the terminals gently with a dry cloth or a cloth slightly dampened with vinegar. Dry thoroughly before recharging.
For tools you won't use for months, store the battery at partial charge, roughly 50 percent. A battery stored at full charge degrades faster than one stored at half capacity. Check the charge level every few months if the tool sits unused for extended periods.
How to Store Power Tools to Prevent Rust and Corrosion
Storage environment determines whether tools remain in working condition or develop rust and corrosion. Moisture is the primary enemy. Even small amounts of humidity cause metal components to oxidize and moving parts to seize.
Store power tools in a dry location. A climate-controlled garage or workshop is ideal. If your garage experiences temperature swings or humidity spikes, consider a sealed storage box with moisture-absorbing packets inside. Silica gel packets (the kind found in new electronics packaging) absorb excess moisture and keep the microclimate inside the box dry.
Before storing, wipe the entire tool with a dry cloth to remove any moisture from the day's use. Pay special attention to the chuck, trigger mechanism, and any exposed metal surfaces. A light coat of machine oil on exposed metal surfaces creates a temporary protective barrier, though this is optional for tools stored indoors.
Store tools in a location where they won't be knocked around or crushed. A wall-mounted pegboard or tool rack keeps tools visible, organized, and protected.
| Storage Condition | Best Practice | Outcome |
|---|---|---|
| Humidity | Store in dry location; use silica gel packets | Prevents rust and corrosion on metal parts |
| Temperature | Keep between 50-85°F | Maintains battery health and motor performance |
| Organization | Use wall rack or pegboard | Prevents physical damage and makes tools accessible |
| Battery | Store separately at 50% charge | Extends battery lifespan by 2-3 years |
| Moisture | Wipe tools dry before storage | Prevents electrical shorts and surface corrosion |
Power Tool Cleaning Supplies and When to Replace Power Tool Brushes
Having the right cleaning supplies on hand makes maintenance faster and more effective. You don't need expensive specialty products, basic, affordable items work just as well.

Establishing a Power Tool Maintenance Schedule
Consistency is key. A maintenance schedule ensures no tool is neglected and problems are caught early. The schedule should reflect how often you use each tool.
Frequently Asked Questions
How often should you perform maintenance on power tools?
Perform basic cleaning after every use, especially if the tool was exposed to sawdust or debris. Deep maintenance like lubrication and brush inspection should happen monthly for frequent users, or every 3-6 months for occasional use. Tools used in dusty environments need more frequent attention. A regular power tool maintenance schedule prevents wear and extends service life significantly.
What is the best thing to clean power tools with?
Use compressed air to blow out dust and debris from ventilation slots and housing. For stubborn buildup, a soft wire brush works well on metal parts. Microfiber cloths remove fine dust without scratching. For greasy residue, a light degreaser on a cloth is effective. Avoid water unless the tool is waterproof rated. Power tool cleaning supplies should never include harsh solvents that damage seals or insulation.
When should I replace power tool brushes?
Carbon brushes typically last 1-3 years depending on use frequency. Signs you need to replace power tool brushes include reduced power, visible sparking inside the tool, or brushes worn to half their original length. Check brushes during your maintenance schedule. Many cordless tools with brushless motors eliminate this concern entirely, offering longer service life with virtually zero brush wear.
Can I restore old or neglected power tools?
Yes, many neglected tools can be restored. Start with thorough cleaning to remove rust and corrosion. Apply a protective coating to metal surfaces. Replace worn brushes, worn-out batteries, or damaged cords. Lubricate moving parts and check calibration on precision tools. However, if the motor is damaged, the housing is cracked, or electrical components are compromised, professional servicing or replacement may be necessary. Regular maintenance prevents the need for restoration.