


Table of Contents
- Step 1: Measure Your Space and Create a Floor Plan
- Step 2: Declutter and Categorize Everything
- Step 3: Define Your Storage Zones
- Step 4: Choose the Best Garage Storage Systems
- Step 5: Organize Small Garage Space Efficiently
- Step 6: Install Vertical Storage and Overhead Racks
- Step 7: Label, Maintain, and Adjust Your Layout
- Frequently Asked Questions
Last Updated: September 28, 2026
Step 1: Measure Your Space and Create a Floor Plan
The first step in how to plan garage organization layout is to understand your space. Measure your garage's length, width, and height, and note the locations of doors, windows, and electrical outlets.
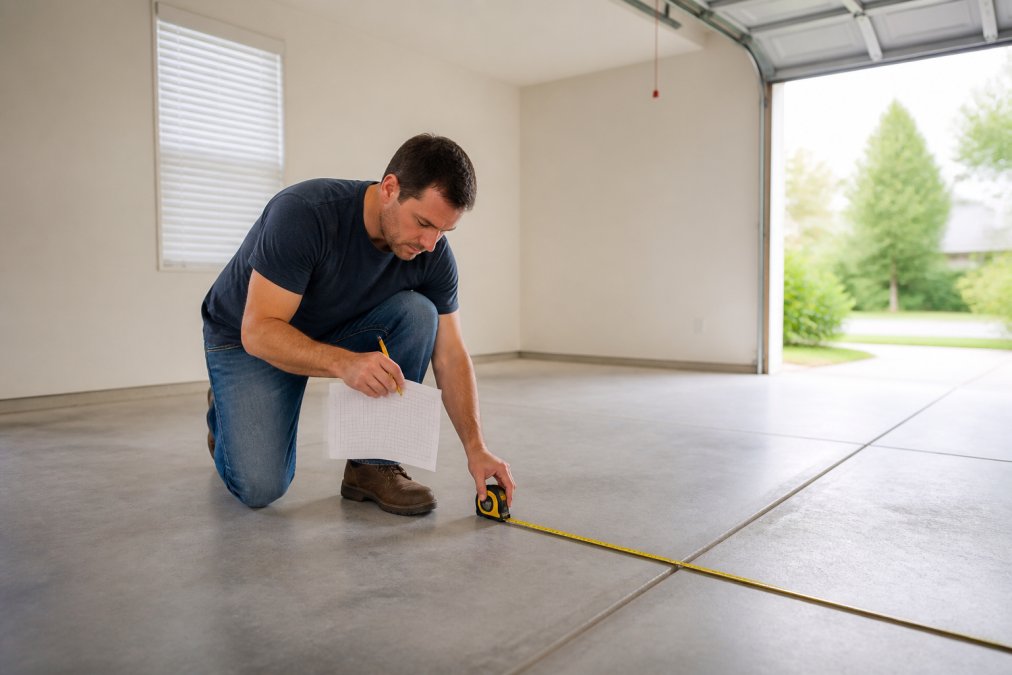
Sketch a floor plan on grid paper (one square = one foot), marking fixed obstacles like support posts, water heaters, and HVAC units. This prevents costly mistakes and shows where vertical space can be maximized.
A floor plan answers key questions: How much clearance do you need for vehicles? Where can you add wall-mounted storage without blocking pathways? Which zones make sense for your activities? This prevents costly mistakes like shelving that blocks the garage door.
Step 2: Declutter and Categorize Everything
Remove everything from your garage. This is the only way to see what you actually own and what's taking up space unnecessarily.
Sort items into clear categories:
- Keep and use regularly (tools, sports equipment, seasonal items)
- Keep but rarely use (holiday decorations, old camping gear)
- Donate or sell (broken tools, duplicate items, things you haven't touched in years)
- Trash (damaged goods, expired products, anything unusable)
Be honest: if you haven't used something in two years, you probably won't. Removing clutter is the fastest way to create usable space without buying anything. Keep only what serves a purpose today or within the next year.
Step 3: Define Your Storage Zones
A successful garage organization layout divides your space into functional zones. Each zone keeps related items together, saves time when you need something, and prevents items from scattering.
Common storage zones include:
- Tool zone, hand tools, power tools, fasteners in one area
- Seasonal zone, holiday decorations, winter tires, outdoor cushions
- Sports and recreation, bikes, skateboards, camping equipment
- Automotive zone, car maintenance supplies, lubricants, cleaning products
- Garden and yard, shovels, rakes, fertilizer, hoses
Keep items you use together in one spot, categorization reduces wasted time. Consider workflow: place the automotive zone near where you park, and the sports zone near the garage exit.
Step 4: Choose the Best Garage Storage Systems
Selecting the right storage systems determines whether your garage organization layout succeeds. The best systems match your space, budget, climate, and actual use.
Budget-Tier Planning
Storage systems fall into three budget categories:
- DIY/Low-Cost ($0-$300): Pegboards, wall hooks, and basic metal shelving. Best for renters or testing layouts. Trade-off: limited weight capacity.
- Mid-Range ($300-$1,200): Heavy-duty adjustable metal shelving (100-200 lbs per shelf), wall-mounted tracks, and plastic bins. Best value for most homeowners.
- Premium ($1,200+): Custom cabinetry and integrated systems. Best for serious workshops or high-value collections.
Most households use mid-range heavy-duty metal shelving, which handles weight, adjusts as needs change, and offers good value.

Material Durability and Climate Considerations
Your storage material choice affects durability and maintenance:
- Metal shelving: Rust-resistant when powder-coated. Best for damp climates. Lifespan: 10-15 years.
- Wood shelving: Vulnerable to moisture and warping. Use only in climate-controlled spaces with sealant. Lifespan: 5-20 years depending on climate.
- Plastic bins: Excellent for humidity resistance. Keep away from direct sunlight. Lifespan: 5-10 years.
- Composite/resin cabinets: Moisture-resistant, no rust. Ideal for coastal or humid climates. Lifespan: 15-20 years.
In humid garages, metal or resin storage outperforms wood. In heated, dry garages, wood shelving works with proper sealing.
Accessibility and Ergonomic Placement
Place frequently used items at waist to shoulder height (28-60 inches). Use overhead racks only for seasonal items accessed 2-3 times per year. For accessibility, use adjustable shelving at natural reach height, lightweight plastic bins (5-15 lbs), pull-out shelves, and wall-mounted hooks at shoulder height.
Weight Capacity and Load Planning
Heavy-duty metal shelving handles significant weight. Distribute weight across multiple shelves rather than stacking everything on one unit. Match the system to what you're storing.
72" Adjustable Metal Shelving →
Step 5: Organize Small Garage Space Efficiently
Small garages demand smart strategies. How to organize small garage space efficiently means thinking vertically, using wall space creatively, and designing zones around your specific hobbies rather than generic categories.
Hobby-Specific Layout Patterns
The most functional small garages are organized by activity, not item type. Identify your primary use case and build the layout around it:
The Workshop Layout: Workbench along one wall (36-48" deep, 48-72" wide), tool storage above or beside at arm's reach, power tools on a mobile cart within 3 feet, material storage vertically along the back wall, overhead racks for rarely used items, and clear floor space in front. A 2-car garage can accommodate a 4-foot workbench, tool wall, and one parking space.
The Fitness/Gym Layout: Equipment along walls, dumbbell storage on wall-mounted racks (2-3 sq ft), resistance bands on hooks, mirror on one wall, overhead racks for seasonal gear, and rubber flooring in the workout zone. A 1-car garage can fit a functional home gym using vertical storage.
The Gear Storage Layout: Bike wall mount (holds 3-6 bikes in 4-6 sq ft), camping gear bins on shelving, sports equipment on wall-mounted racks, seasonal rotation bins on overhead racks, clear floor space for loading/unloading, and a small workbench for maintenance.
Vertical Storage Strategy for Small Spaces
Clear the floor completely. Wall-mounted storage opens floor space for vehicles, work areas, or movement:
- Pegboards and slat walls: Mount to wall studs.
- Wall-mounted tracks and shelving: Mount tracks to studs, hang shelves at any height. Cost: $150-$400 for 8 feet.
- Overhead racks: Mount to ceiling joists. Cost: $100-$300 per rack. Capacity: 300-500 lbs.
- Corner shelving: Holds 40-80 lbs. Cost: $50-$150.
Use vertical space aggressively:
- Mount shelves from floor to ceiling
- Add wall hooks for bikes, ladders, and cords (use heavy-duty hooks rated for 25-50 lbs each)
- Install overhead racks for boxes and seasonal gear
- Use corner spaces with corner shelving units
Container and Bin Strategy
Containers and bins organize small items and maximize shelf space. In a small garage, visibility and accessibility matter more than storage capacity.
- Clear plastic bins: Let you see contents without opening them. Label the front and spine. Stack up to 3-4 bins high on shelves. Cost: $5-$15 per bin depending on size.
- Labeled cardboard boxes: Cheaper ($1-$3 each) but less durable in humid garages. Use for seasonal items you pack away for months.
- Wall-mounted pegboard bins: Attach directly to pegboards for small tools, fasteners, and hardware. Cost: $2-$8 per bin.
- Magnetic tool holders: Mount on metal shelving or walls for metal tools and fasteners. Cost: $10-$30 per holder.
Label everything so you find what you need without digging through multiple containers. Use a label maker or permanent marker on masking tape. In small garages, accessibility matters more than storage capacity. It's better to have fewer items you can easily reach than a packed garage where you can't find anything.
Floor Space Allocation
In a small garage, decide upfront how much floor space you'll dedicate to each activity:
- Parking: If you park a vehicle, reserve that space first (typically 9×18 feet for one car)
- Work/movement: 4×8 feet minimum for a workbench or exercise area
- Walkway: 3-foot-wide path from the entry door to the vehicle or work area
- Storage: Everything else goes vertical
If you don't park in the garage, you have full floor space to work with.
Step 6: Install Vertical Storage and Overhead Racks
Vertical storage transforms how much you can fit in your garage. Wall-mounted solutions and overhead racks are the difference between a cluttered garage and an organized one that actually functions.
Step 7: Label, Maintain, and Adjust Your Layout
A well-organized garage stays organized only with labeling and maintenance. Without labels, items end up in the wrong zones and clutter returns within weeks.
Frequently Asked Questions
What's the best way to start planning a garage organization layout?
Begin by measuring your garage floor and creating a floor plan on grid paper. Note the square footage, door locations, windows, and any permanent fixtures like water heaters or electrical panels. This foundation prevents costly mistakes and helps you visualize how storage zones will fit. Once you have accurate measurements, you can experiment with different layouts before purchasing anything.
How do I organize small garage space without making it feel cramped?
Focus on vertical space and overhead storage to maximize your square footage. Use wall-mounted tracks, pegboards, and shelving units that reach higher than eye level. Heavy-duty shelving like the 72" Adjustable Metal Shelving ($101.99) provides storage without consuming floor space. Keep the center of your garage clear for vehicle access or workflow, and use foldable options like the 5-Tier Heavy Duty Foldable Metal Storage Rack ($57.99) for items you don't access daily.
What are the main storage zones I should create?
Divide your garage into functional zones based on activities: a tool and hardware zone for frequently used items, a seasonal storage zone for holiday decorations and off-season equipment, a hobby zone for specific interests like automotive work or gardening, and a utility zone for cleaning supplies and maintenance items. Keep high-traffic zones clear and place items you use regularly at waist height for accessibility and ergonomics.
How do I know if a storage system will actually fit and hold what I need?
Check the weight capacity of any shelving or rack before purchasing. Verify the dimensions against your floor plan to ensure clearance from walls, doors, and vehicles. Consider the depth and height of your items, tools and equipment need different storage depths than seasonal boxes. Heavy-duty shelving units are designed for heavy loads and durability, making them ideal for garages where you're storing tools, equipment, and supplies regularly.