


Table of Contents
- Top Polyaspartic Garage Floor Coating Kits for 2026
- Polyaspartic vs Epoxy Garage Floor: Which Wins in 2026?
- How Long Does Polyaspartic Take to Cure?
- DIY Polyaspartic Garage Floor Kit: What You Need to Know
- Polyaspartic Floor Coating Cost Per Square Foot: A 2026 Breakdown
- Long-Term Performance: Durability, UV Stability, and Failure Points
- Frequently Asked Questions
Last Updated: September 15, 2026
Top Polyaspartic Garage Floor Coating Kits for 2026
If you are searching through polyaspartic garage floor coating reviews 2026, the short answer is that most reputable kits now fall into three tiers: single-coat DIY systems, multi-coat DIY systems, and full professional-grade packages. We have watched homeowners move away from traditional epoxy in favor of polyaspartic because it cures faster, resists yellowing, and handles the freeze-thaw cycles that destroy lesser coatings. The catch is that "polyaspartic" on a label does not guarantee performance. Solids content, aliphatic resin percentage, and the quality of the basecoat determine whether your floor lasts three years or fifteen.
Below, we break down what separates a good kit from a bad one, how polyaspartic compares to epoxy head-to-head, and the real timeline you should expect from mixing to parking your car.
Quick Comparison Table: Features and Pricing
| Kit Type | Cure Time | Best For | Typical Coverage |
|---|---|---|---|
| Single-coat DIY | 8-12 hours | Small garages, light traffic | 200-250 sq ft/gal |
| Multi-coat DIY | 12-24 hours | Daily drivers, tool storage | 180-220 sq ft/gal |
| Professional-grade | 24-48 hours | Heavy vehicle load, showroom finish | 150-200 sq ft/gal |
Polyaspartic vs Epoxy Garage Floor: Which Wins in 2026?
Polyaspartic wins on cure speed and UV stability; epoxy wins on upfront cost and thick build. That is the honest trade-off, and any review that tells you one product dominates every category is selling something.
Here is where most guides get it wrong: they treat polyaspartic and epoxy as competitors when the best floor coating systems actually combine both. A polyurea or epoxy basecoat provides the thick, impact-resistant foundation, while a polyaspartic topcoat delivers the fast cure and color retention. This hybrid approach gives you the tensile strength of epoxy with the abrasion resistance of polyaspartic.
Epoxy resin has one weakness that matters in a garage: it yellows under UV exposure. If any part of your floor sees sunlight through an open door, an epoxy-only system will discolor within a couple of seasons. Polyaspartic is aliphatic, meaning it resists that yellowing.
The one drawback of polyaspartic is the smell and the short pot life. You have roughly 20-40 minutes to work once you mix, so plan your pours carefully.
How Long Does Polyaspartic Take to Cure?
Most polyaspartic coatings are ready for foot traffic in 8-12 hours and vehicle traffic in 24 hours, compared to 3-7 days for standard epoxy. That fast cure rate is the single biggest reason homeowners choose it.
A realistic timeline looks like this:
- Surface prep and diamond grinding: 3-6 hours
- Basecoat application: 1-2 hours
- Topcoat and decorative flakes: 1-2 hours
- Foot traffic: 8-12 hours after final coat
- Vehicle load: 24 hours after final coat
- Full chemical resistance: 48-72 hours
Temperature matters. Below 60°F, cure slows significantly. Above 90°F, your pot life shrinks and you risk lap marks. Aim for a garage temperature between 65°F and 80°F.
DIY Polyaspartic Garage Floor Kit: What You Need to Know
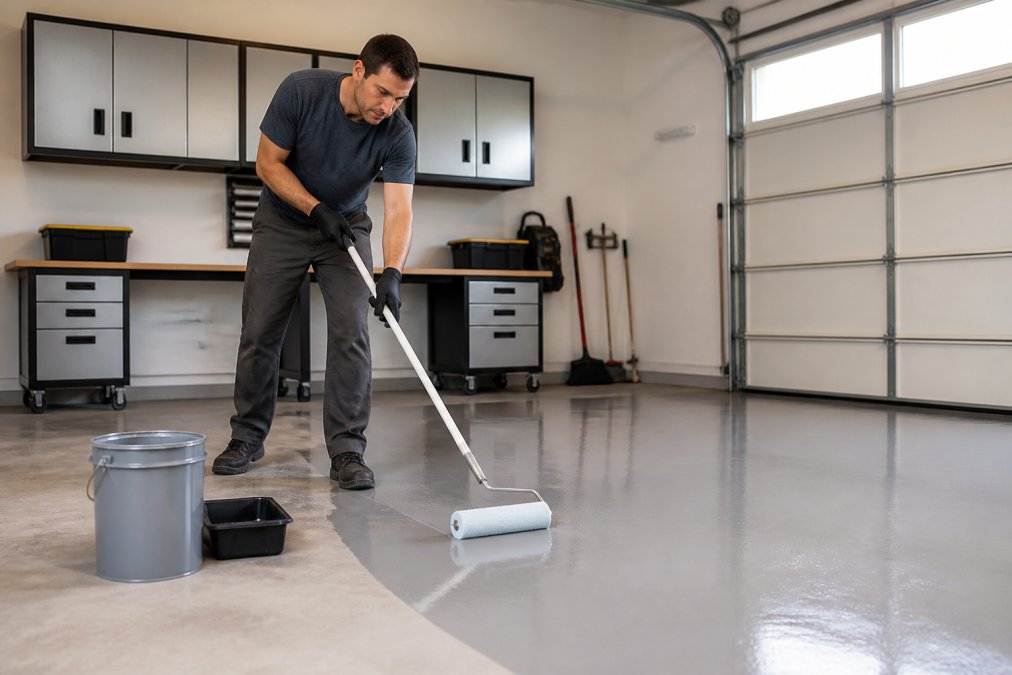
A DIY polyaspartic garage floor kit is a pre-measured package of resin, hardener, and often a basecoat, designed for homeowner application with basic tools. The kits work, but only if your concrete preparation is thorough.
The prep is where DIY jobs fail. A common mistake is skipping diamond grinding and assuming acid etching is enough. Polyaspartic needs a profiled, porous surface for substrate adhesion. If the concrete is sealed, oily, or smooth, the coating will peel within a year.
What you will need:
- Diamond grinder or shot blaster
- Moisture test kit
- Concrete patch for cracks
- Roller with 3/8-inch nap and extension pole
- Spiked shoes
- Mixing drill and paddle
- Decorative flakes if desired
Check for moisture vapor transmission before you coat. Tape a plastic sheet to the floor for 24 hours; condensation underneath means you need a moisture-proof primer or the coating will delaminate.
Polyaspartic Floor Coating Cost Per Square Foot: A 2026 Breakdown
Polyaspartic floor coating cost per square foot depends on whether you buy a kit or hire a professional, and on how much surface prep your concrete needs. Because resin prices shift with supply, the honest answer is to anchor yourself to a range and then verify current kit pricing directly.
DIY kit cost. A single-coat DIY polyaspartic kit typically runs $1.50 to $3.00 per square foot of coverage when you buy a pre-measured package. Multi-coat systems with a separate basecoat and topcoat land closer to $2.50 to $4.50 per square foot. These figures assume you already own or rent the prep equipment. If you need to rent a diamond grinder, add roughly $100 to $200 per day to the project total.
Professional installation cost. A full professional-grade polyaspartic system, diamond grinding, crack repair, moisture barrier primer, basecoat, flake broadcast, and topcoat, commonly prices between $4.00 and $8.00 per square foot, with higher-end showroom finishes and heavy flake coverage pushing toward the top of that range. A standard two-car garage (roughly 400 to 500 square feet) therefore lands somewhere between $1,600 and $4,000 installed, depending on prep condition and finish level.
What drives the cost up:
- Diamond grinding versus acid etching (grinding is more expensive but delivers the profile polyaspartic needs)
- Number of coats in the floor coating system
- Decorative flakes, metallic additives, or quartz broadcast
- Moisture barrier primer when vapor transmission is present
- Crack repair, spall repair, and patching
- Garage size, larger slabs lower the per-square-foot labor rate
What drives the cost down:
- Coating a new, clean, unsealed slab that needs minimal prep
- Choosing a single-color, no-flake finish
- Doing the prep and application yourself with a quality kit
The ROI question. A polyaspartic floor is not a home-value line item the way a kitchen remodel is, but it does protect the slab, resists hot tire pickup, and eliminates the dusting and staining that bare concrete develops. Most homeowners treat the cost as a durability purchase: a 10- to 15-year service life spread across a $2,000 to $3,000 investment works out to a modest annual cost compared with recoating a failing epoxy floor every few years.
For current kit pricing, check the product pages directly, since published figures go stale fast. When comparing kits, divide the total kit price by the stated coverage in square feet to get a true per-square-foot number, that is the only apples-to-apples comparison that matters.
Long-Term Performance: Durability, UV Stability, and Failure Points
A properly applied polyaspartic floor should deliver 10-15 years of service life in a residential garage, but the failure points are predictable and worth knowing before you buy. Most reviews stop at the benefits. This section covers what actually goes wrong, why, and how to tell the difference between a coating problem and a concrete problem.
Failure 1: Delamination from moisture vapor transmission. This is the most common and most misdiagnosed failure. Concrete is porous, and moisture moves through it from the soil below.
Frequently Asked Questions
What are the downsides of polyaspartic floor coating?
Polyaspartic coatings have a very short pot life, often 15 to 20 minutes, so you must work quickly or risk wasting mixed material. They also cost more per square foot than standard epoxy. Proper concrete preparation is critical; without diamond grinding, the coating can peel. Some formulas have strong fumes during application, so ventilation is essential. Finally, while polyaspartic resists UV yellowing, it can still scratch under heavy abrasion if not topcoated with a clear finish.
Can you apply polyaspartic directly to concrete without a primer?
Most polyaspartic kits are designed as a single-coat system, but they still require a clean, profiled concrete surface. You do not always need a separate primer if the concrete is properly prepared with diamond grinding and moisture testing. However, if the concrete is porous, has cracks, or shows high moisture vapor transmission, a primer or moisture barrier is recommended. Always follow the kit manufacturer's instructions for your specific product.
How does polyaspartic compare to traditional epoxy in 2026?
Polyaspartic cures much faster than epoxy, often in 2 to 4 hours for foot traffic versus 12 to 24 hours for epoxy. It also offers superior UV stability, meaning it won't yellow like many epoxies. Polyaspartic has higher abrasion resistance and can be applied in a wider temperature range. However, epoxy typically costs less and has a longer pot life, making it easier for beginners. For garage floors, polyaspartic is often the better long-term choice.
What is the expected lifespan of a polyaspartic garage floor coating?
A professionally applied polyaspartic garage floor coating can last 15 to 20 years or more with proper maintenance. DIY kits may last 10 to 15 years if the surface is well-prepped and the coating is applied correctly. Factors like vehicle traffic, chemical spills, and UV exposure affect longevity. Regular cleaning and prompt spill cleanup extend the life. Some manufacturers offer warranties of up to 15 years on commercial-grade systems.
Choosing a garage floor coating comes down to matching the system to your climate, your traffic, and your willingness to prep the concrete properly. Superior Tool Garage and Outdoors carries the heavy-duty storage solutions and specialized tools that make garage projects easier to finish right, from spiked shoes and mixing paddles to durable shelving that keeps your space organized once the floor is done. Shop now at Superior Tool Garage and Outdoors and get the job done right.