


Table of Contents
- What You'll Need: Tools and Materials for Your Portable Workbench
- Best Plywood Thickness for Workbench and Work Surface Design
- Step-by-Step Assembly: Building Your Portable Workbench
- How to Build a Workbench on a Budget Without Sacrificing Quality
- Stability and Weight Capacity: Achieving the Right Balance
- Portability and Storage: Space-Saving Solutions for Small Workshops
- Common Mistakes to Avoid When Building a Portable Workbench
- Frequently Asked Questions
Last Updated: September 26, 2026
What You'll Need: Tools and Materials for Your Portable Workbench
Building a portable workbench requires basic power tools, hand tools, fasteners, and lumber, most costing less than you'd expect.

Here's what you'll actually need:
Power Tools:
- Cordless drill driver (the 12V Power Cordless Drill from Superior Tool Garage and Outdoors works well for this project)
- Circular saw or miter saw
- Orbital sander (optional but helpful)
Hand Tools:
- Tape measure
- Square
- Pencil
- Clamps (at least 4)
- Hammer
- Screwdriver set
Fasteners & Hardware:
- Wood screws (1.25" and 2.5")
- Bolts and washers for hinge mechanisms
- Wood glue
Materials:
- Plywood sheets (3/4" thickness for work surface)
- Lumber for frame and legs (2x4 and 2x2)
- Hinges for folding mechanism
The 50 Piece General Household Toolbox from Superior Tool Garage and Outdoors covers most hand tools you'll need if you're starting from scratch. It includes hex keys, pliers, screwdrivers, and a measuring tape.
Best Plywood Thickness for Workbench and Work Surface Design
The work surface is where your projects happen. Thickness matters for stability and durability.
Use 3/4" plywood for the work surface. This thickness gives you enough material to hold fasteners securely and resists sagging under weight. Anything thinner (1/2") will flex when you clamp parts to it. Anything thicker wastes money and adds unnecessary weight.
3/4" plywood provides enough depth for bolts, bench dogs, and countersunk screws without stripping or punching through.
Plywood grade matters too. Use AC or BC grade plywood. The "A" side faces up (smoother finish). The "C" side can have knots and voids, but that's fine for the underside. Avoid cabinet-grade plywood, it costs more and offers no advantage for a workbench.
Start with 30" × 48", wide enough for most projects but light enough to move and store.
Step-by-Step Assembly: Building Your Portable Workbench
Building a portable workbench takes one weekend if you stay organized. Follow these steps in order and you'll have a functional work surface by Sunday afternoon.
Step 1: Prepare Your Cut List and Materials
Write down every piece before cutting. Measure twice, cut once. Lay out all materials and sand rough edges on lumber before assembly to prevent splinters.
Step 2: Build the Base Frame and Leg Assembly
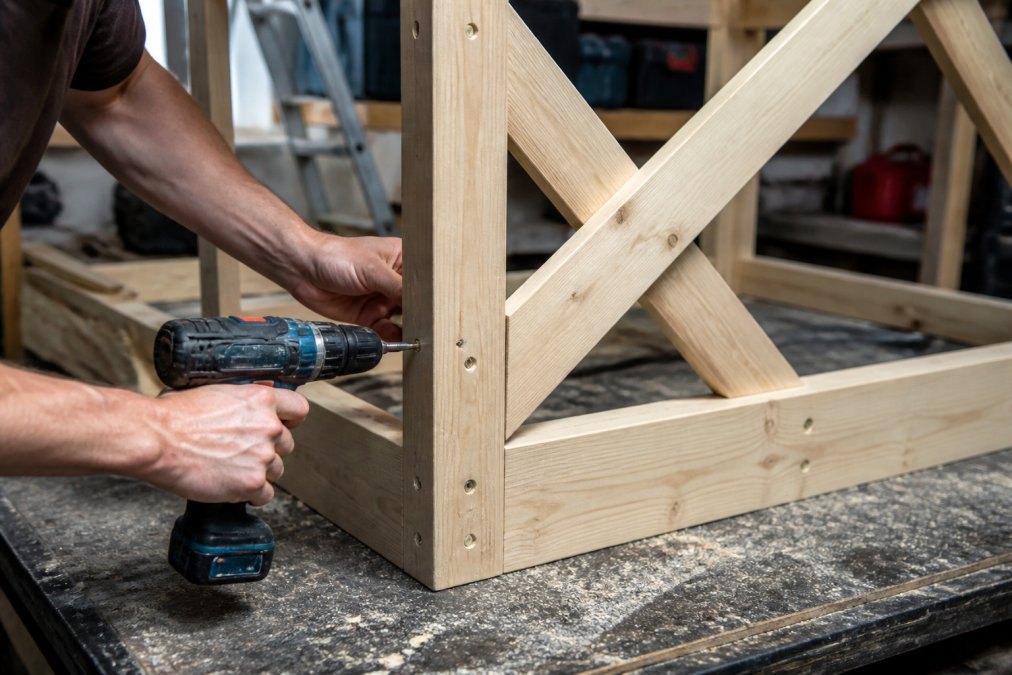
Build the frame by laying two long rails parallel 24" apart, connecting them with short rails at each end using 2.5" wood screws (two per joint). Check corners are square, then attach legs with bolts and washers, bolts won't loosen over time like screws.
Step 3: Add Cross-Bracing for Structural Integrity
Install diagonal 2x2 bracing on two sides of the base frame, running from the bottom of one leg to the top of the opposite leg to create an X pattern. Use 1.25" screws (three per end) to distribute stress and prevent splitting.
Step 4: Attach the Work Surface and Clamping Surface
Center the 3/4" plywood on the frame and secure with 1.25" wood screws spaced 12" apart around the perimeter and every 18" in the middle. Countersink screws slightly below the surface. Drill holes 4" apart around all edges for bench dogs.
Step 5: Install the Folding Mechanism and Hinges
Position hinges on one long side of the work surface and secure with bolts (not screws). Ensure legs fold inward when the work surface folds up. Test the fold several times before finishing.
6 or 8 FT Portable Folding Table →
How to Build a Workbench on a Budget Without Sacrificing Quality
Save money on standard lumber, bulk plywood, and finishes. Don't skimp on hinges, fasteners, work surface plywood, or clamps, cheap versions fail fast. Reclaimed or pallet lumber works well if inspected carefully for nails, rot, or damage.
The 50 Piece General Household Toolbox costs under $35 and includes everything you need for assembly. That's a smart investment if you don't already have basic hand tools.
Stability and Weight Capacity: Achieving the Right Balance
Stability comes from a solid base frame, proper cross-bracing, and weight distribution. Beginners often struggle with wobble because they don't understand the weight-to-stability ratio.
Heavier frames resist wobble but are harder to move. Lighter 2x4 frames need aggressive diagonal X-bracing and wide leg spacing to stay rigid. Proper bracing and geometry outperform heavier frames with minimal bracing.
Position legs at least 24" apart on the short dimension. A wide base resists tipping and side-to-side movement.
Portability and Storage: Space-Saving Solutions for Small Workshops
A portable workbench must be storable. For apartments, small garages, or shared workshops, wall-mounted storage often determines whether it gets used or becomes clutter.
Wall-Mounted Storage: The Space-Saving Solution
Vertical Storage Without Wall Mounting
- Lean-to storage: Fold the workbench and lean it against a wall at a slight angle. Secure it with a strap or bungee cord to prevent tipping.
- Corner storage: Fold it and place it in a corner, using the two walls as natural supports. This works well in garages or basements.
- Vertical storage rack: Build a simple wooden frame that holds the folded workbench vertically. This takes up minimal floor space (about 3 feet wide and 6 feet tall).
Optimize Your Folded Footprint
When folded, measure your workbench's actual dimensions:
- Width: Usually 30" (the width of your work surface)
- Height when folded: Usually 6"-12" (depending on how tightly you fold it)
- Depth: Usually 24"-36" (the depth of your work surface)
Portable Workbench Placement in Different Spaces
- Small garage (under 400 sq ft): Wall-mount it to free up floor space. Unfold it only when you're actively working.
- Apartment workshop: Use a corner or lean-to storage. Choose a location away from high-traffic areas so it doesn't become a tripping hazard when folded.
- Shared workshop: Store it vertically in a dedicated rack so it doesn't consume valuable bench space.
- Basement workshop: Wall-mount it on a basement wall (avoid damp exterior walls). Ensure the wall is dry and well-ventilated to prevent wood rot.
Protect Your Workbench During Storage
- Cover it with a canvas tarp or cloth. This keeps dust off the work surface and protects the finish.
- Store it in a dry location. Avoid damp basements or garages where humidity can warp the wood or rust fasteners.
- Keep it away from direct sunlight. UV exposure can fade the finish and weaken the wood over time.
- Check it periodically. Every few months, unfold it and inspect for loose fasteners, cracks, or signs of moisture damage.
Common Mistakes to Avoid When Building a Portable Workbench
Most first-time builders make the same mistakes. Learn from them so you don't waste time and materials.
| Mistake | Impact | Fix |
|---|---|---|
| Thin plywood | Sagging work surface | Use 3/4" plywood minimum |
| Weak hinges | Loose folds over time | Choose bolted hinges |
| No cross-bracing | Wobbling frame | Add diagonal 2x2 bracing |
| Oversized surface | Too heavy to move | Keep it under 30" × 48" |
| Loose joints | Failure under pressure | Tighten all fasteners fully |
Frequently Asked Questions
What thickness of plywood should I use for a portable workbench?
For a portable workbench work surface, use 3/4-inch plywood as your top layer. This thickness provides the clamping surface strength you need for drilling and fastening without being too heavy. If you're building on a tight budget, you can use 1/2-inch plywood for the base frame, but don't compromise on the work surface thickness, it directly affects stability and how well your bench dogs and t-track hardware will hold.
How much does it cost to build a portable workbench from scratch?
A basic portable workbench costs $150-$300 in materials if you use reclaimed wood or budget lumber, plus $50-$100 for hardware like hinges, fasteners, and bench dogs. The 50 Piece General Household Toolbox ($33.99) covers most fasteners and basic tools you'll need. If you already own a drill driver and saw, you'll spend less. Premium options with t-track and outfeed table extensions run $400-$600, but the beginner version is highly affordable.
Is it cheaper to buy or build a workbench?
Building a portable workbench is typically 40-60% cheaper than buying a pre-made model. A DIY workbench costs $150-$300 depending on materials, while commercial folding workbenches start around $400-$800. Beyond cost, building your own lets you customize the work surface dimensions, weight capacity, and folding mechanism to fit your specific job site needs. The 6 or 8 FT Portable Folding Table ($119.99) can serve as a starting point or outfeed table extension.
What essential tools do I need to build a workbench?
You'll need a drill driver to install fasteners, a circular saw or handsaw to cut lumber, a level to ensure your work surface is flat, measuring tape for accurate cut lists, and clamps to hold pieces while assembling. The 12V Power Cordless Drill ($154.99) handles drilling and driving fasteners efficiently. A 50 Piece General Household Toolbox ($33.99) provides hex keys, screwdrivers, and other basics. A sanding tool helps smooth the work surface for better clamping grip.